

|
Step 1 - Introduction & Preperation Step 2 - Drawing & Building your Car Part 1 Part 2 Part 3 Step 3 - Coloring your Car |
Step 4 - Adjusting Car Scale & Alignment Step 5 - Adding Car Wheels Step 6 - Setting up Car Stat & Physics Step 7 - Test Driving your Car |
|
Step 4 - Adjusting Car Scale & Alignment
Adjusting Car Scale & Alignment is to basically make sure your car's size is not too big or not too small compared to the other cars in the game, to make sure that it fits in the game correctly and to adjust it if it doesn't. It is also to make sure and adjust that you have built the car pointing in the right direction and upright correctly, this is just incase you had flipped any of the -ve section of the X, Z or Y Axis with the +ve section in the drawing. It can also be used to re-center the car along the X, Y or Z Axis, the center of the car in the Axis is also its center of ration in the game. Let's start first by checking its size, in the 3D Edit open the "Scale & Align" tab: 
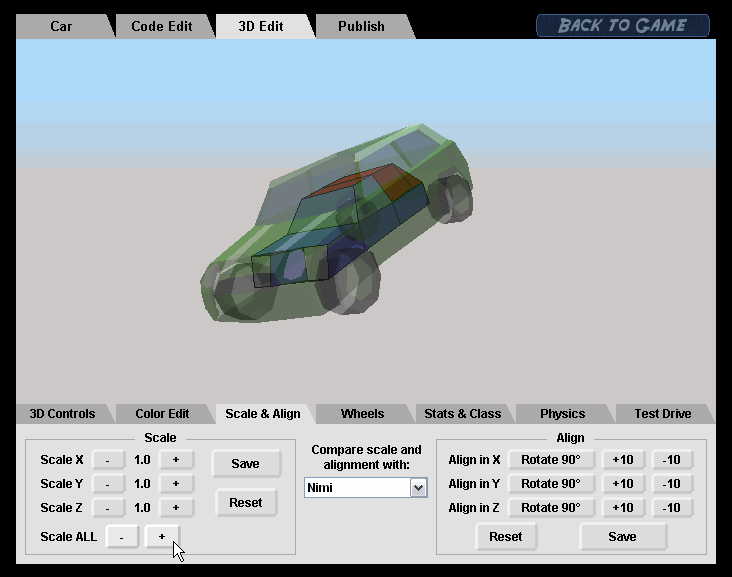
Use the "Compare Car..." select option to choose a Need for Madness car to compare it with your car. Because our simple car looks like a small car, we are going to compare it with Nimi! 
As you can see above, when we compared our car with Nimi, it turned out that our car is really quite small compared, which is wrong. So we need to increase our car's scale, we are going to use the "Scale ALL" option and click the plus button to increase: 
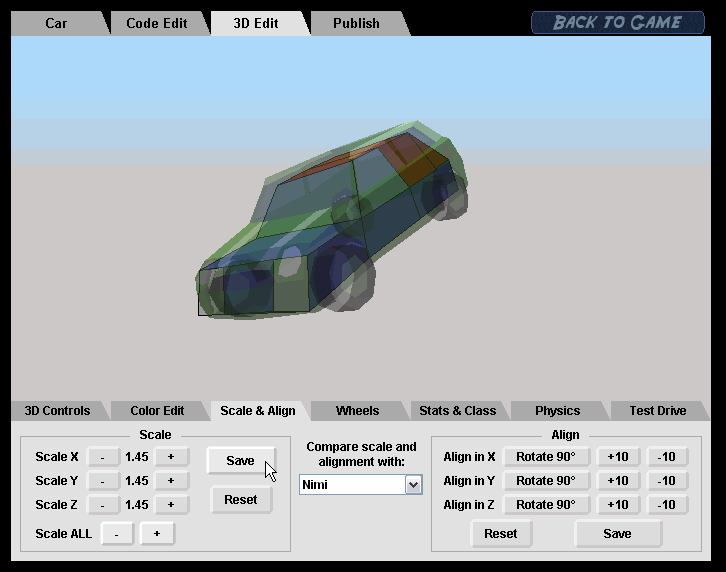
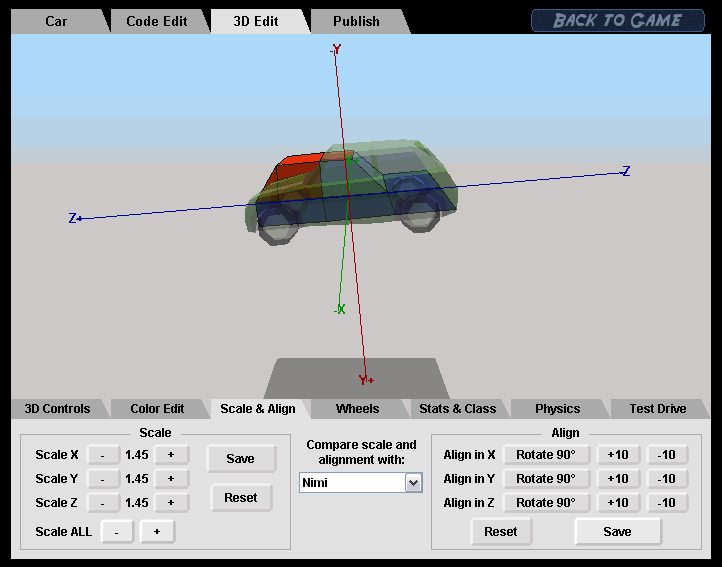
As shown above, we have increased car's size by 1.45 (145%), we have made the car just slightly smaller then Nimi. Have you compared and adjusted the size for your car as well? Good, don't forget to press save! The scaling option can also be used to stretch and shrink the car in any of the X, Y, or Z Axis separately. Using the "Scale X", "Scaly Y" and "Scale Z" options. This is for, if your car is to narrow from the sides (in X) for example, you can use the "Scale X" option to increase its width from the sides to make it more proportionate. Now let's check the car's alignment! From the comparison we made with Nimi, we already know that our car is upright correctly and pointing the right direction as well. If your car is not aligned in the X, Y or Z Axis correctly it may look like something this when compared: 
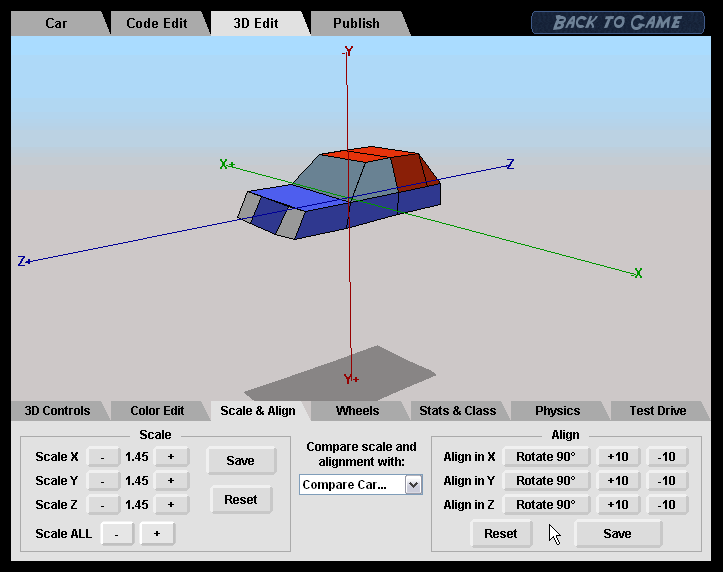
This is an example of a car that was drawn incorrectly along the Z axis (the -ve side of the Z Axis was flipped with the +ve side). As you can see in that case our car is pointing in one direction and Nimi is pointing in the opposite direction. If this is the case for your car, or if this ever occurs for you in the future, simply use the "Rotate 90°" options to rectify and adjusted it to point in the right direction. Notice that once you place the mouse in the "Align" box the X, Y, Z Axis appears. To re-center your car use the "+10" and "-10" buttons to move it along any of the Axis. This is, if for some reason the center of the car is too far in front or back, or even outside the car model, also it could be too high or too low. This option is to adjust that. And you should be very careful when aligning in X, as a car is normally symmetric from both sides so the center of X should always be dead in the center of the car. However for our car, because we drew the X, Y and Z Axis in the center of the car and with correct +ve and -ve signs, our car is already nicely centered and aligned and we don't need to adjust it. 
Is your car's scale and alignment adjusted correctly? Good now we are ready to move on to adding wheels to the car!
|